Audio Mixers, also known as mixing consoles or soundboards, are electronic devices used to combine, balance, and process audio signals from various sources. They come in all shapes and sizes, from compact portable mixers for small gigs to large-scale consoles in professional recording studios.
Understanding Audio Mixers
Types of Audio Mixers
Several types of Audio mixers are available, each tailored to different applications. Analog mixers utilize traditional circuitry and knobs, offering a hands-on approach to mixing. Digital mixers, on the other hand, use digital signal processing to provide greater flexibility and control.

Basic Components
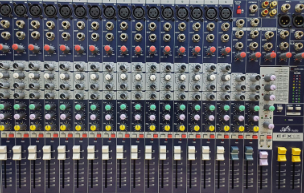
Regardless of their type, all audio mixers share common components such as channels, faders, EQ controls, and aux sends. Channels accept input signals from microphones, instruments, or other sources, while faders adjust the volume of each channel independently. EQ controls allow you to fine-tune the frequency response of individual channels, while aux sends signals to external effects processors or monitors.
Advanced Features
Modern audio mixers often have various advanced features, including built-in effects, digital recording capabilities, and motorized faders. These features can significantly enhance your mixing workflow and creativity but may also come at a higher price point.
Choosing the Right Audio Mixers
Considerations
When choosing an Audio Mixers, it’s essential to consider factors such as the number of input channels, built-in effects, and connectivity options. Think about your specific needs and budget constraints before making a decision.

Budget
Audio mixers come in a wide range of price points, from budget-friendly options for beginners to high-end consoles for professional engineers. Determine your budget and prioritize features that are most important to you.
Usage Scenarios
Consider how you’ll use the mixer – whether for live sound reinforcement, studio recording, or podcasting. Different scenarios may require additional features and capabilities.
Setting Up Your Audio Mixers
Connection Guide
Before mixing, you’ll need to connect your audio sources to the mixer. Typically, it involves plugging microphones, instruments, and other devices into the input channels using XLR or TRS cables.
Initial Configuration
Once everything is connected, it’s time to configure your Audio Mixers settings. Set the levels for each channel, adjust the EQ to balance the frequency response, and route signals to the desired outputs.
Basic Mixing Techniques
Volume Adjustment
One of the fundamental tasks of mixing is balancing the volume levels of different audio sources to create a cohesive sound. Use the channel faders to adjust the volume of each input until they blend harmoniously.
Equalization (EQ)
EQ controls allow you to shape the tonal characteristics of individual audio sources by boosting or cutting specific frequencies. Use EQ to remove unwanted noise, enhance clarity, and sculpt the overall sound.
Panning
Panning controls determine the placement of audio signals within the stereo field—experiment with panning to create space and separation between instruments, vocals, and other elements.
Advanced Mixing Tips
Effects Processing
Most Audio mixers offer built-in effects such as reverb, delay, and compression. These effects can add depth, texture, and dynamics to your mix, but use them sparingly to avoid overpowering the original sound.
Automation
Automation allows you to program changes in volume, panning, and effects over time, freeing you up to focus on other aspects of the mix. Take advantage of automation to create dynamic and engaging mixes.
Grouping and Bussing
Grouping and bussing allow you to combine multiple channels into subgroups, making it easier to control and process them collectively. Use grouping and bussing to streamline your workflow and efficiently manage complex mixes.
Troubleshooting Common Issues
No Sound
If you’re experiencing no sound from your Audio Mixers, check the connections, ensure all channels are unmuted, and verify that the master output level is set correctly.
Distortion
Distortion can occur if the input signal is too hot or the gain is too high. Lower the input levels or reduce the gain to prevent distortion and maintain a clean sound.
Feedback
Feedback is caused by amplified sound waves fed back into the system, resulting in a high-pitched squeal or howl. To eliminate input, adjust the placement of microphones and speakers, use EQ to notch out problematic frequencies, or employ feedback suppression devices.
Maintenance and Care
Cleaning
Regular cleaning and maintenance are essential to keep your mixer in optimal condition. Use compressed air to remove dust and debris from faders and knobs, and wipe down the exterior with a damp cloth.
Storage
Store your mixer in a clean, dry environment, away from excessive heat, humidity, and dust when not in use. Cover it with a dust cover or protective case to prevent damage and prolong its lifespan.
Conclusion
In conclusion, audio mixers are indispensable for sound production, offering unparalleled control and versatility. By understanding the basics of audio mixing and mastering essential techniques, you can confidently unleash your creativity and produce professional-quality mixes.